Ubuntu环境下使用Shadowsocks科学上网。使用Vultr服务器搭建SS服务端,并在本地配置网络代理。
注:本机操作系统为 Ubuntu 18.04,服务器的搭建请参考上一篇文章。
参考:
Linux安装配置Shadowsocks客户端及开机自动启动
目录:
Ubuntu环境下网络代理配置
Shadowsocks无GUI客户端配置
SHadowsocks_Qt5客户端配置
Chrome浏览器网络代理配置
终端网络代理配置
1. Ubuntu环境下网络代理配置
Shadowsocks无GUI客户端配置
安装
安装Shadowsocks客户端需要python及其包管理工具pip,通过以下命令可以查看python和pip的版本:
1 | |
确定Python和pip都已经正确安装后,使用以下命令安装Shadowsocks客户端:
1 | |
配置
创建Shadowsocks配置文件:
1 | |
然后在该配置文件中添加服务器信息:
1 | |
详细配置说明:
| Name | 说明 |
|---|---|
| Server | 服务器地址,填IP地址或域名 |
| server_port | 服务器开放端口 |
| local_address | 本地地址,127.0.0.1 |
| local_port | 本地端口,一般为1080 |
| password | 服务器密码 |
| port_password | 服务器端口 + 密码 |
| timeout | 超时重连 |
| method | 加密方式,默认aes-256-cfb |
| fast_open | TCP_FASTOPEN |
测试启动
- 前端启动:sudo sslocal -c /etc/shadowsocks/config.json
- 后台启动:sudo sslocal -c /etc/shadowsocks/config.json -d start
- 后台停止:sudo sslocal -c /etc/shadowsocks/config.json -d stop
- 重启:sudo sslocal -c /etc/shadowsocks/config.json -d restart
开机启动
使用Systemd来实现shadowsocks开机自启。
1 | |
在里面填写如下内容:
1 | |
配置生效:
1 | |
输入管理员密码后配置生效。
Shadowsocks_Qt5客户端配置
Qt5客户端使用snap应用商店的ss-qt。
安装
安装snap:
1 | |
安装ss-qt
1 | |
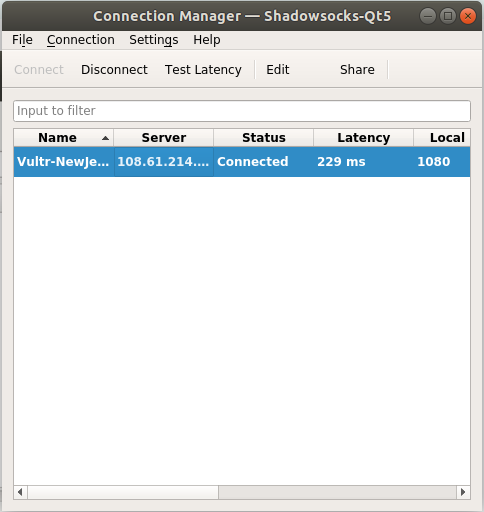
代理配置
添加新的代理配置
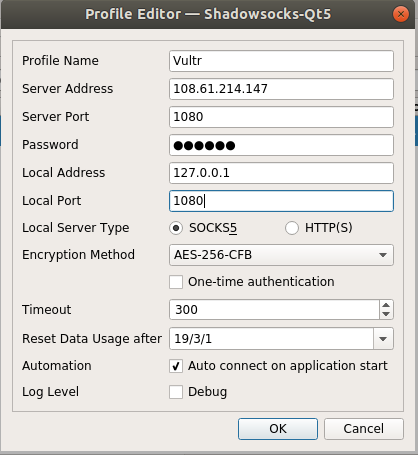
保存后连接。
开机启动
在Startup Application中添加ss-qt即可。
2. Chrome浏览器网络代理配置
安装
使用SwitchyOmege配置Chrome浏览器的网络代理。首先需要在Chrome应用商店内安装SwitchyOmege
在线安装直接打开Chrome应用商店,添加至Chrome即可。(需要科学上网)
离线安装需要先下载SwithcyOmega的离线安装包,下载地址:
1.GitHub:https://github.com/FelisCatus/SwitchyOmega/releases/latest
2.在线下载:https://www.switchyomega.com/download/
下载得到SwitchyOmega_Chromium.crx这个离线安装文件后,在Chrome地址栏输入chrome://extensions打开扩展程序,之后打开开发者模式,将离线安装文件拖入到Chrome中即可进行安装。
配置代理
安装成功后,先删除其自带的情景模式,然后点击New profile新建配置文件。
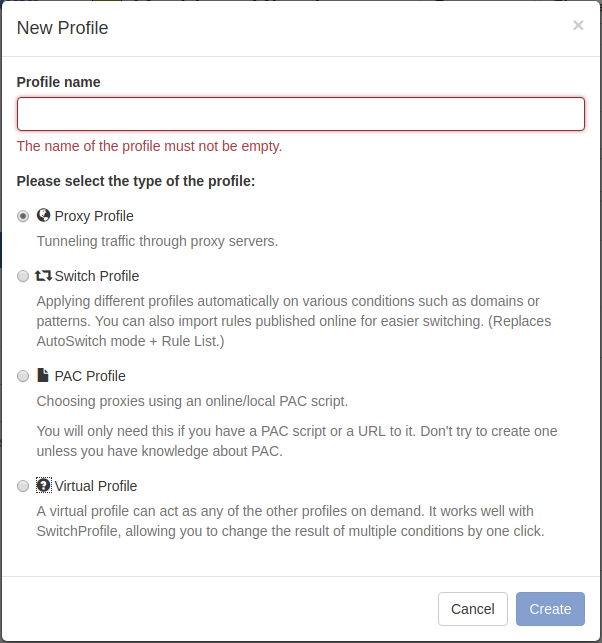
名称为Vultr,类型选择Proxy Profile,点击创建。
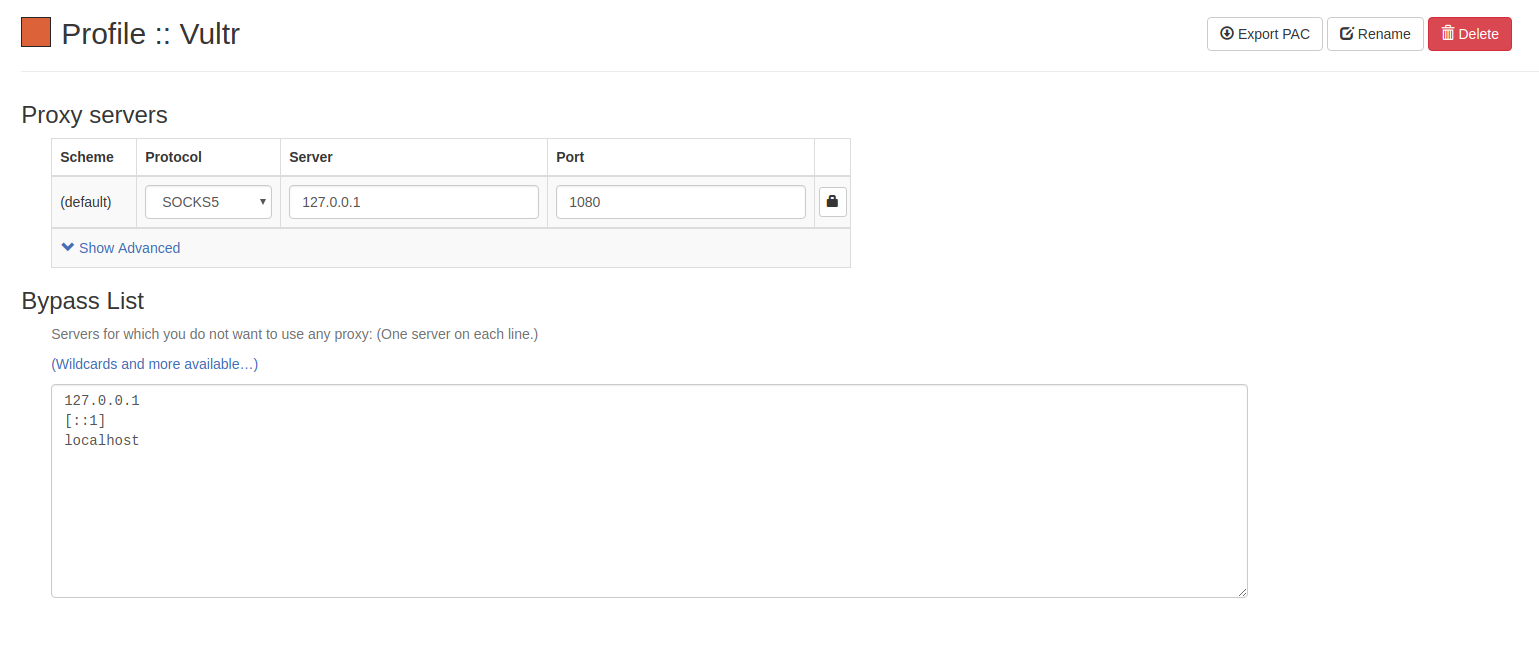
代理协议选择SOCKS5,服务器和端口填写本地IP地址和端口号(local_address和local_port)。
配置完成后点击Apply changes保存配置。
再新建一个配置文件,名称为AutoSwitch,类型选择Switch Profile。
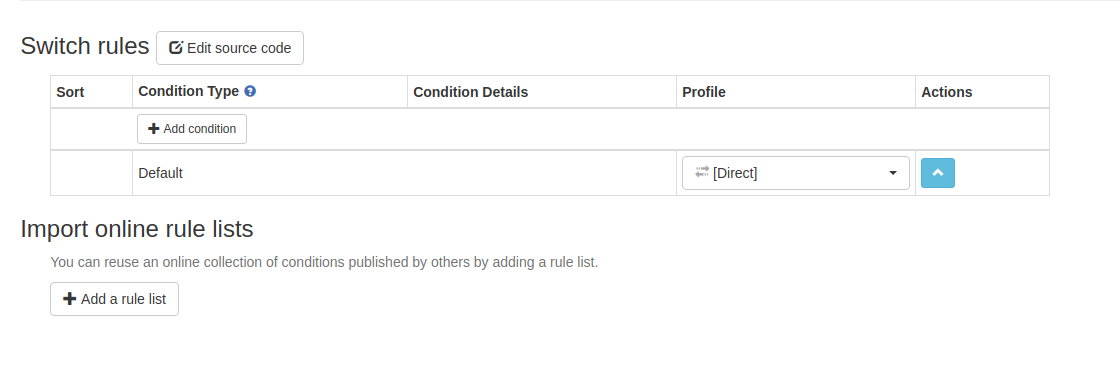
选择 Add a rule list 添加规则列表。
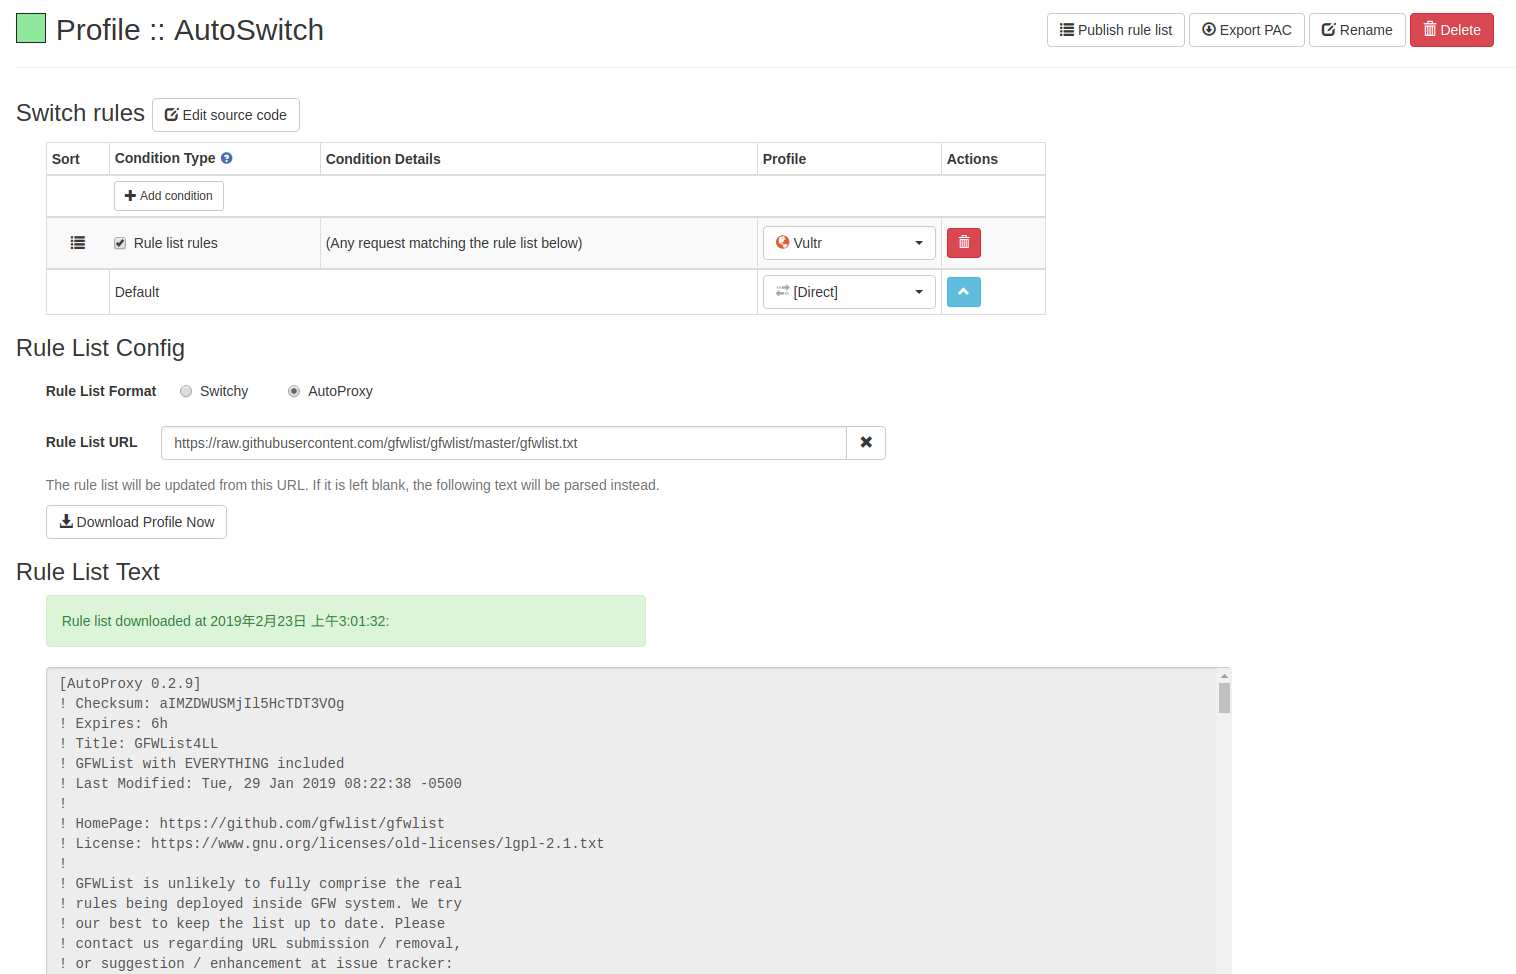
Rule List Format 选择Autoproxy。
Rule List URL 填写:https://raw.githubusercontent.com/gfwlist/gfwlist/master/gfwlist.txt
这个地址是GFWList的地址,基本包含了常用的所有被墙网址,并且一直在更新。
选择 Download Profile Now 下载Profile。
然后将 Switch Rules 中对应的配置文件改为Vultr,保存配置即可。
3. 终端网络配置
在Chrome上,是SwitchyOmega插件把HTTP和HTTPS流量转换成了socks协议的流量,才能使用socks代理。而Ubuntu终端是没有这样的协议转换的,所以没法直接使用sock5代理。这时候就需要一个协议转换器,例如Privoxy。
安装
1 | |
配置
修改privoxy配置文件/etc/privoxy/config,在文件末尾添加如下内容:
1 | |
其中,第1行的 127.0.0.1:1080 是你在本地的SOCKS5代理地址,而第二行的 127.0.0.1:8080 则是SOCKS5转换成的 http 代理地址,最后两行指定了两个不走代理的地址。
配置好以后配置好之后重启Privoxy服务:
1 | |
然后打开 /etc/profile,在最后添加以下两行:
1 | |
即可在终端中科学上网。
测试
1 | |
输入上述命令后显示Google首页的HTML代码即说明配置成功。
1 | |
输入上述命令后显示当前IP地址。
由于执行ping指令使用ICMP传输协议,而SS代理是基于TCP或UDP协议,所以使用ping指令访问Google会超时。